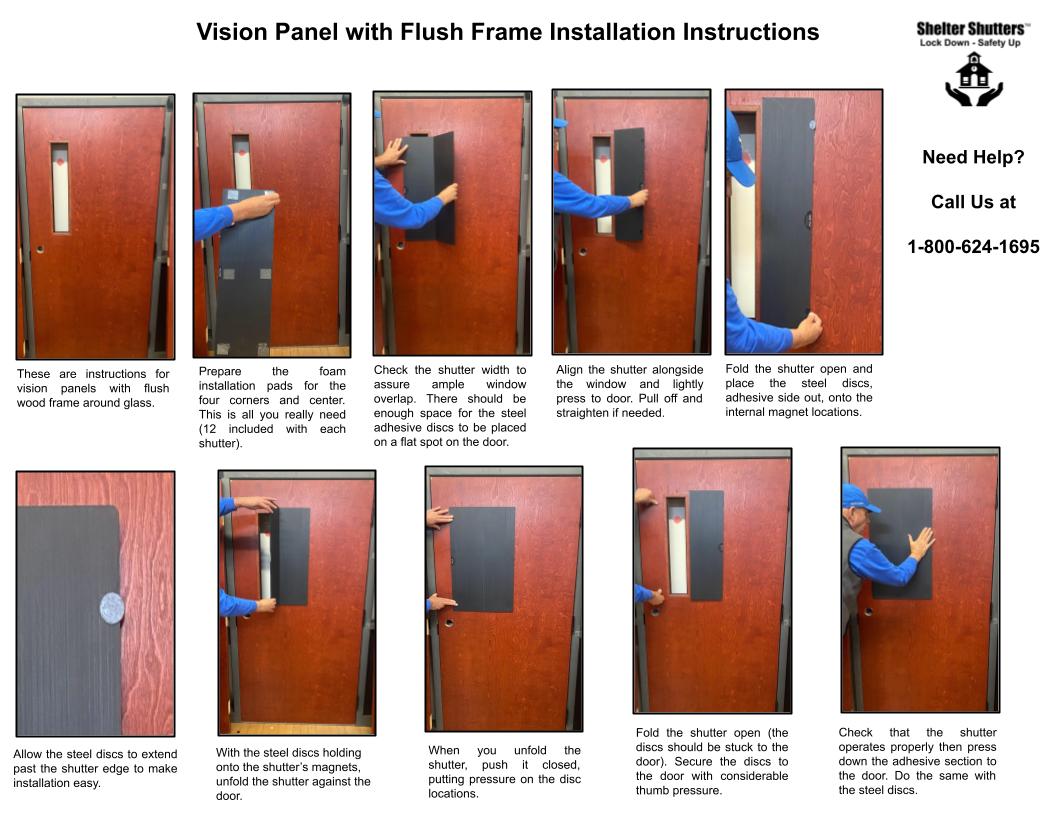
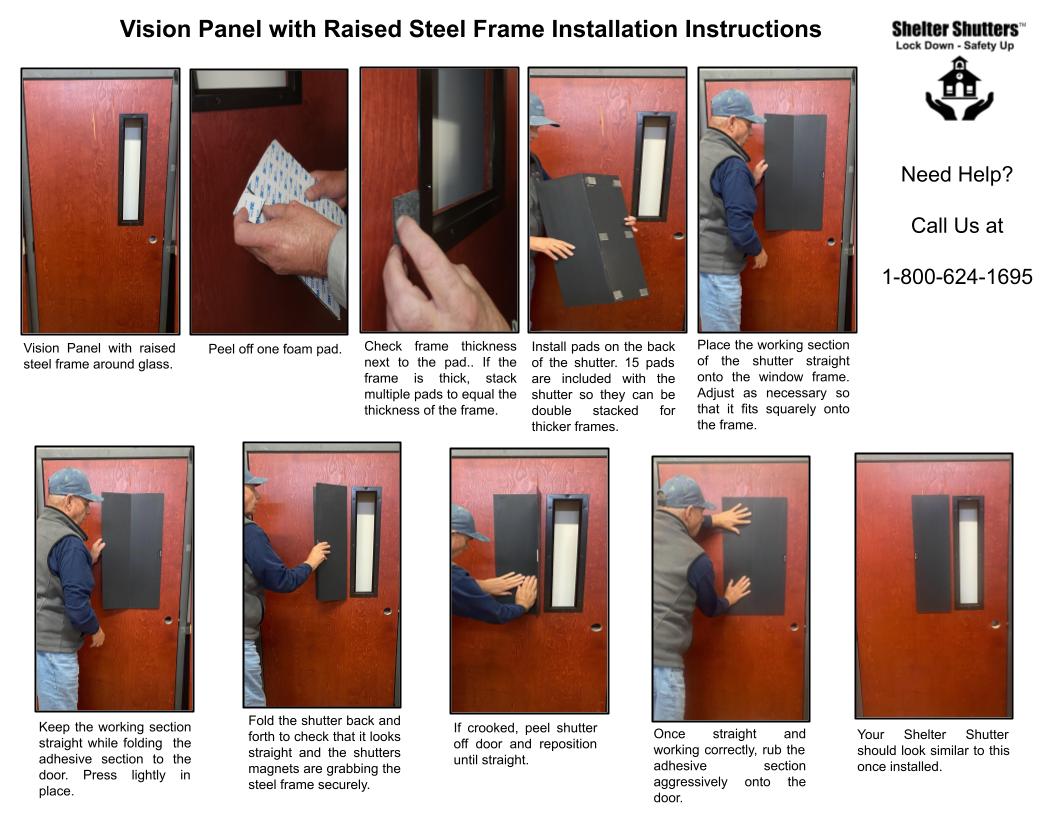
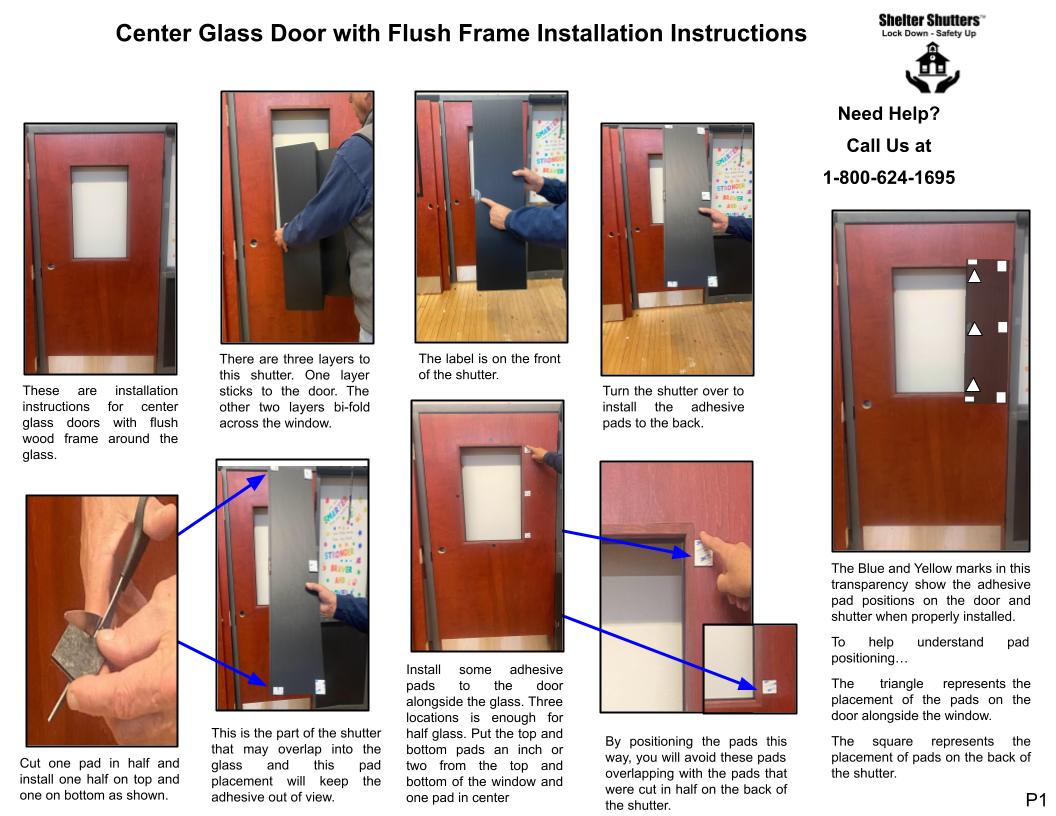
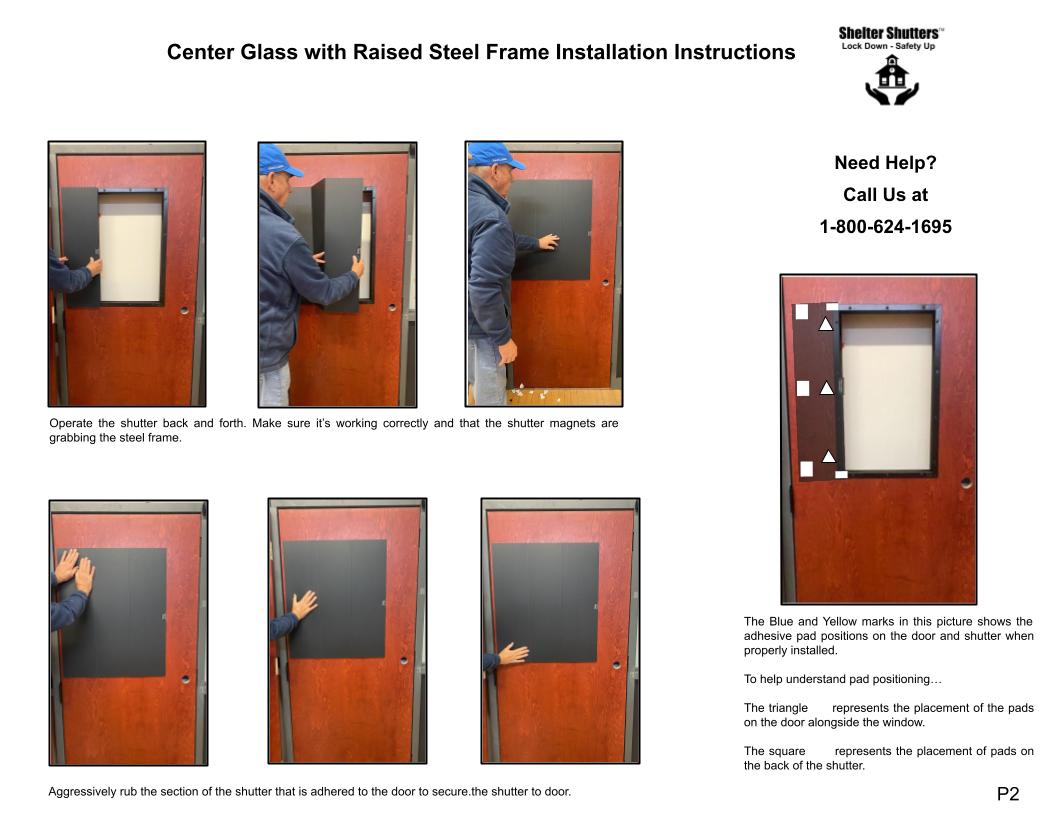
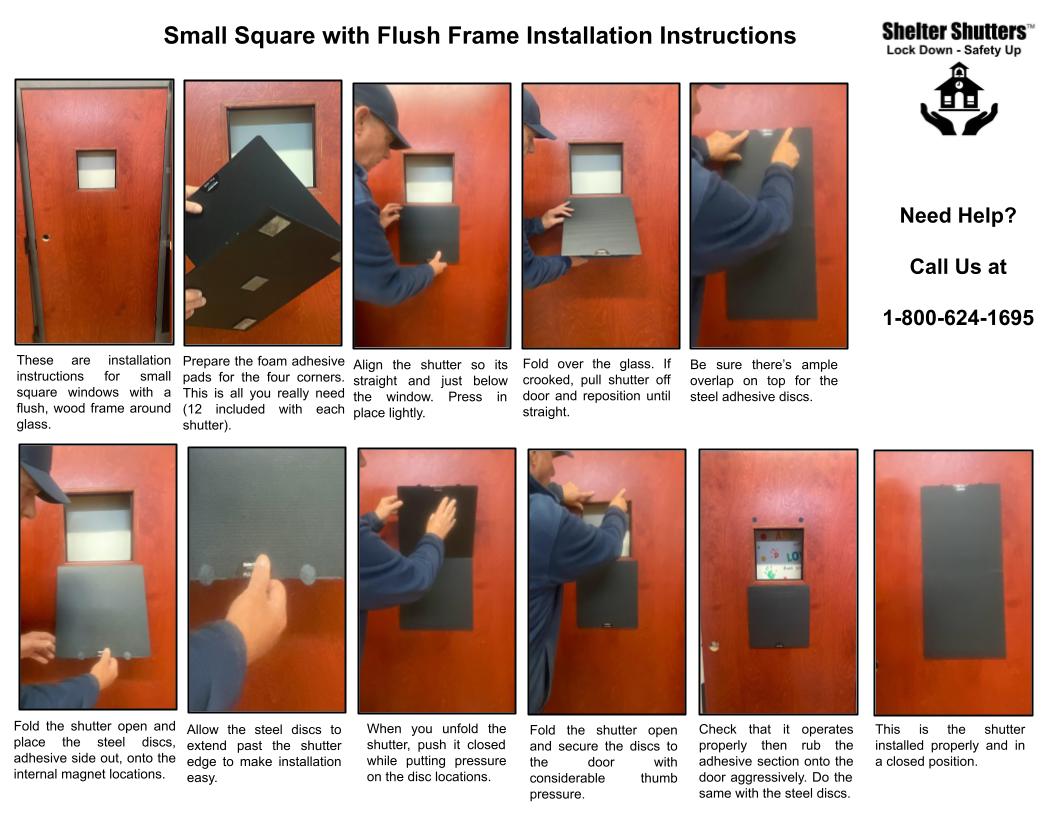
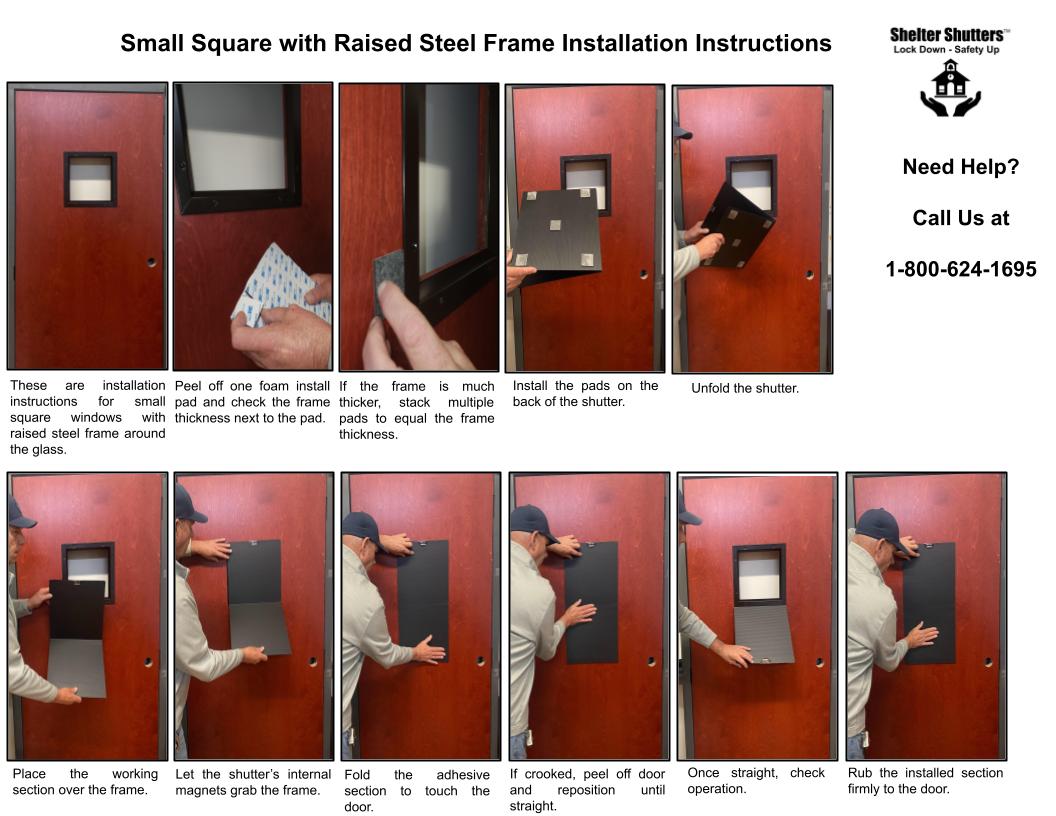
Installation Instructions
Our stock and custom shutters come with all the parts needed to install onto a typical school door or sidelight.
We include several 1 ½ x 1 ½ inch double-sided foam adhesive pads that attach your shutter to the door or sidelight. We also include our standard ¾ or 1-inch round steel adhesive plates for doors that do not have steel around the glass.
You can order extra foam installation pads and steel adhesive plates if necessary. We also offer steel adhesive plates in several different shapes and sizes. We prefer round because these can’t be installed crooked.
Click this link to download the Installation Instructions
You can also scroll down to view the same installation instructions on this page or watch our videos below.
Shelter Shutters Installation
Our Shelter Shutters™ are lightweight and easily installed using pressure tape that is included in your order. No screws are necessary.
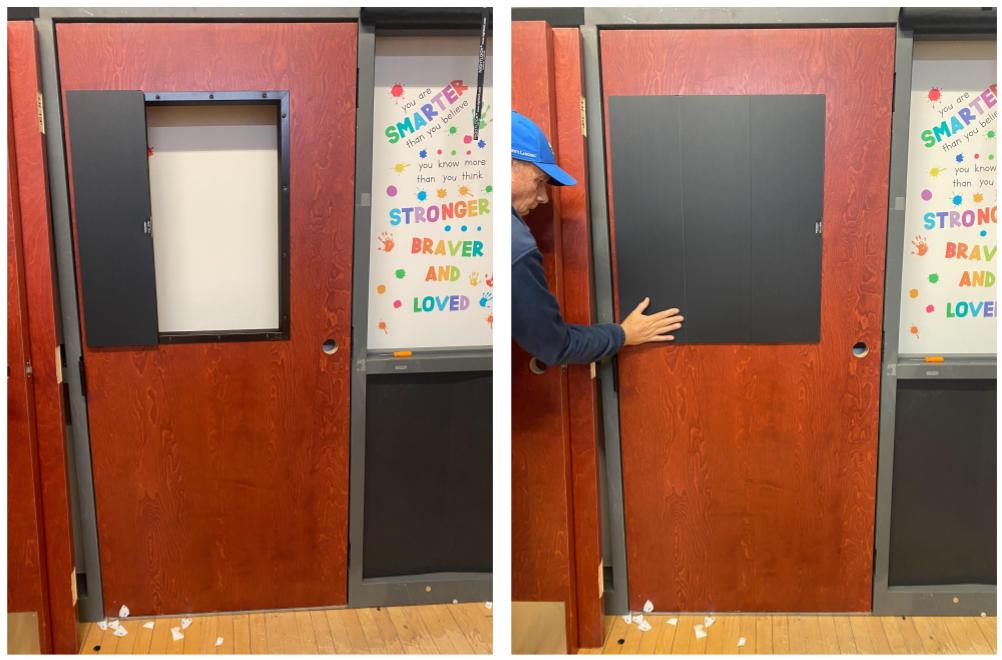
Shelter Shutters Center Vision Panel - Steel Door or Molding
Shelter Shutters Center Vision Panel - Raised Wood Molding
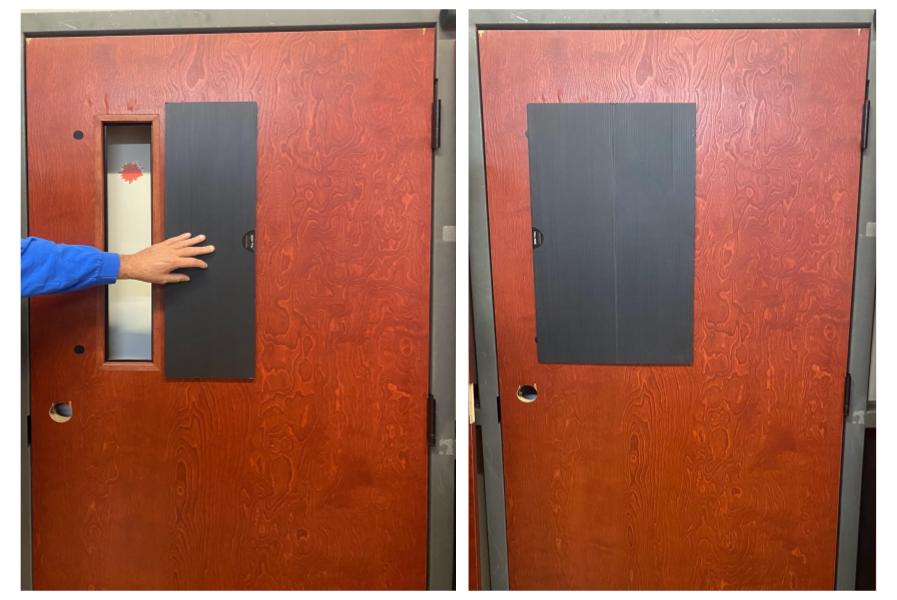
Shelter Shutters Off-Center Vision Panel - Flat Wood Door
Shelter Shutters Center Vision Panel - Flat Wood Door